Okta
The first steps should be taken within the Okta Admin Panel:
Go to Applications under Applications
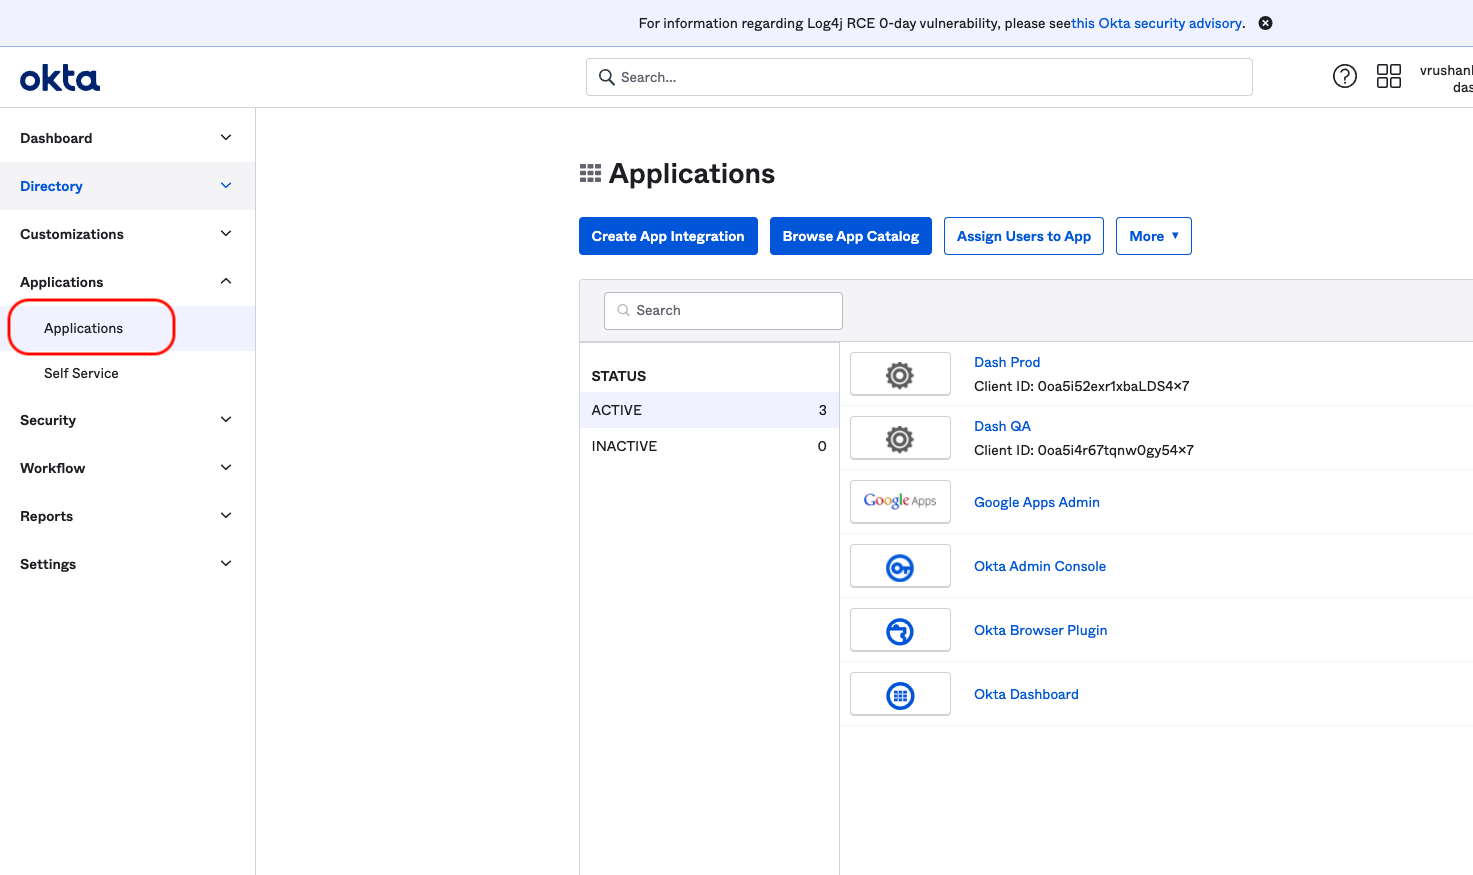
On the Applications page, select Browse App Catalog
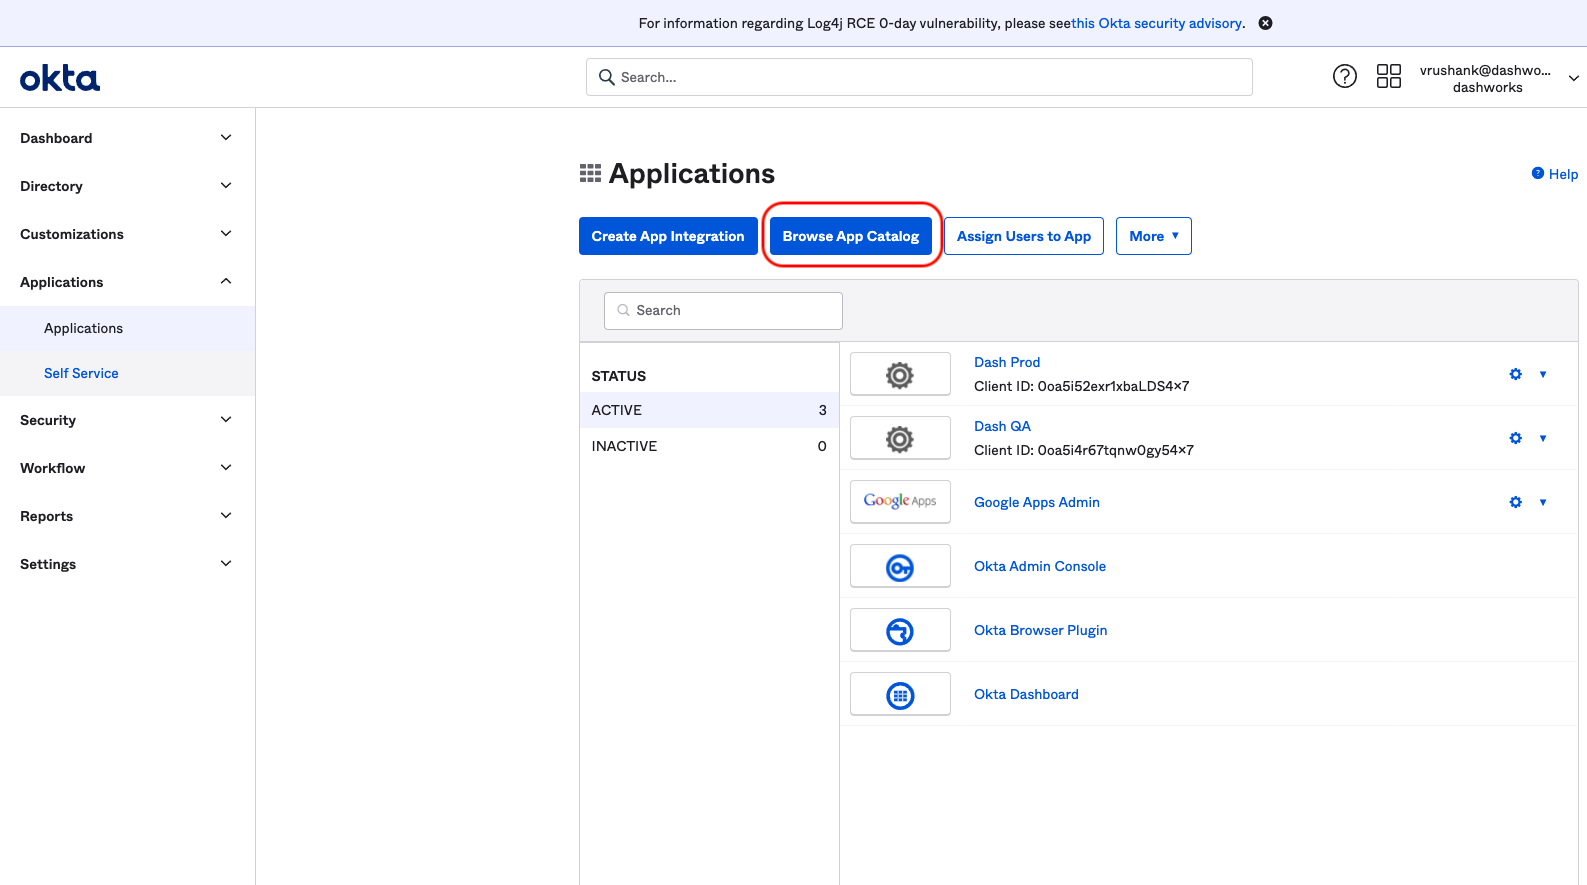
Search for Dashworks App and add it

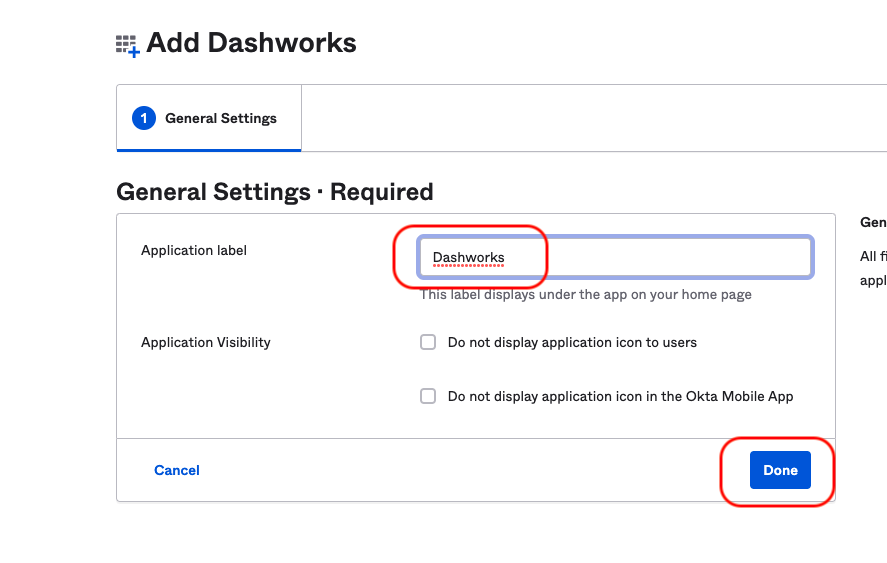
Add an Application label and click Done
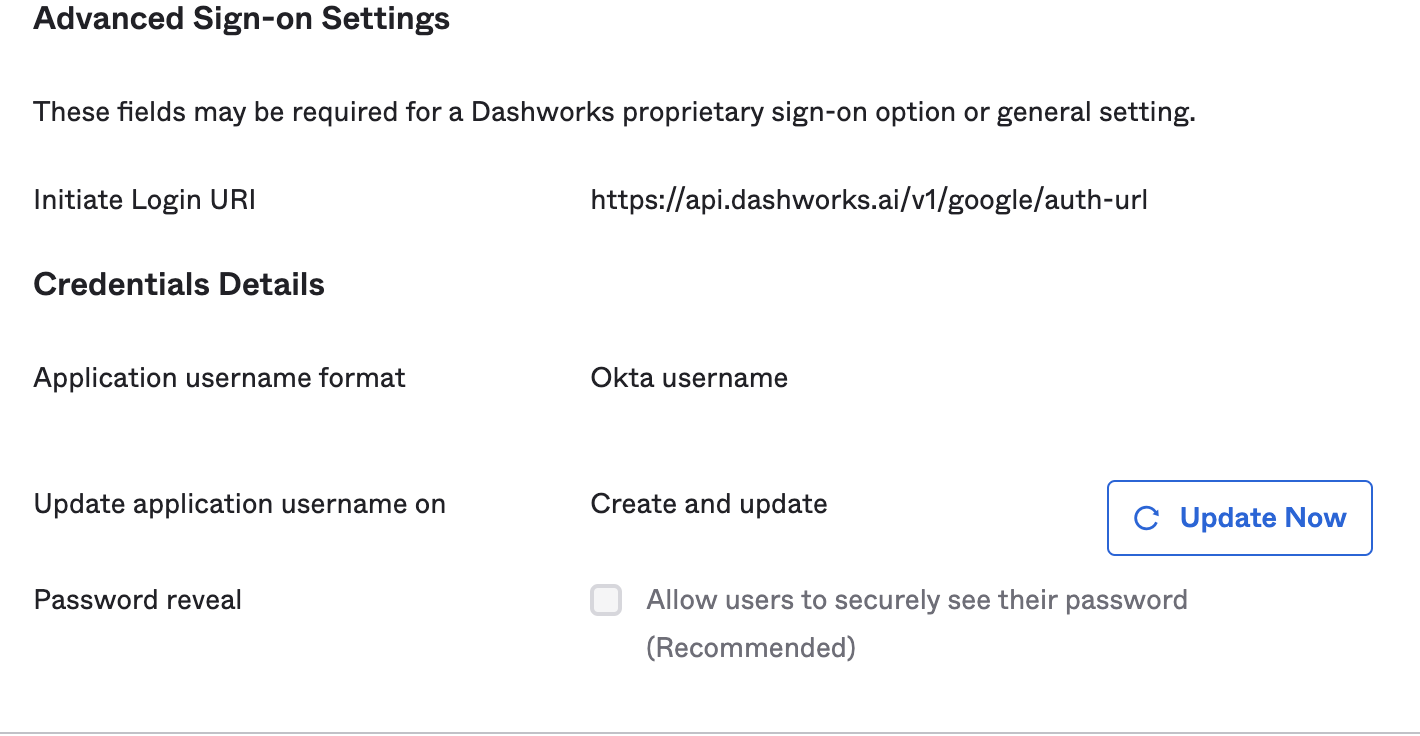
User must specify the Initiate Login URI in the sign-on settings. In most cases this will be https://api.dashworks.ai/v1/google/auth-url?origin=web.dashworks.ai. For on-prem deployment, please contact [email protected] for the Initiate Login URI.
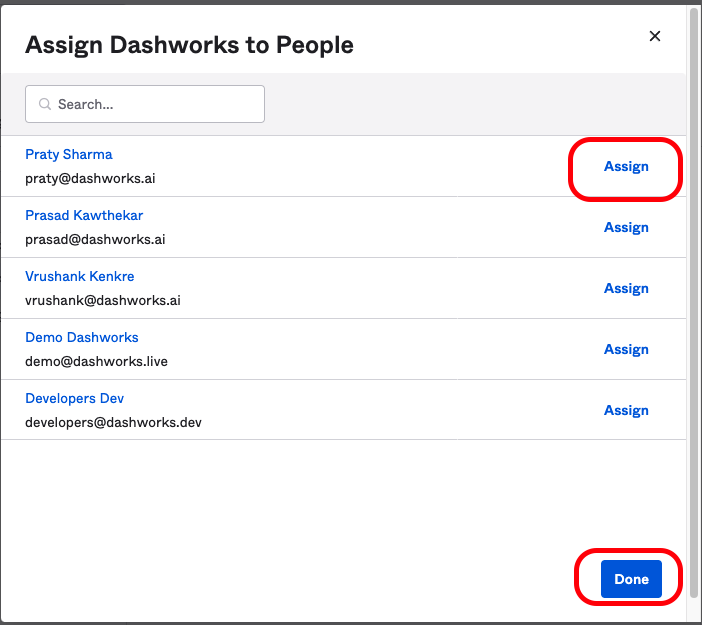
Once the App is added, you will have to assign users to the app under the Assignments tab. This will enable to users to log into Dashworks app using Okta. To add users, navigate to the Assign to People option under Assign option on Assignments Page. If you already have a group you can choose the Assign to Groups option and assign the entire group.

You can add people by clicking the Assign option next to their name. After you have all the people click the Done button
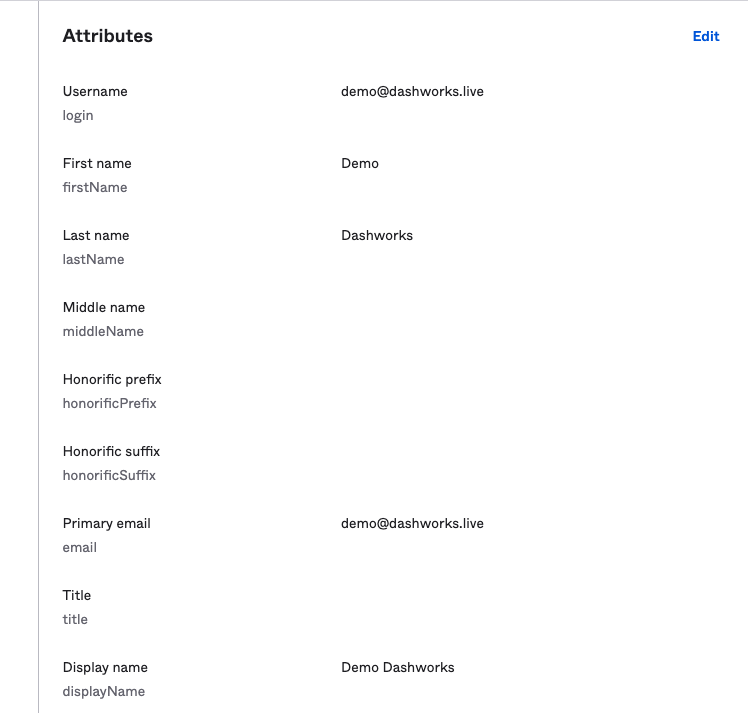
Note: Make sure all the user profiles have these fields populated:
Username
First Name,
Last Name
Primary Email
Display Name.
These fields are required to create profiles in Dashworks. Below is a sample user profile with all required attributes.
Now you're ready to open the Dashworks App:
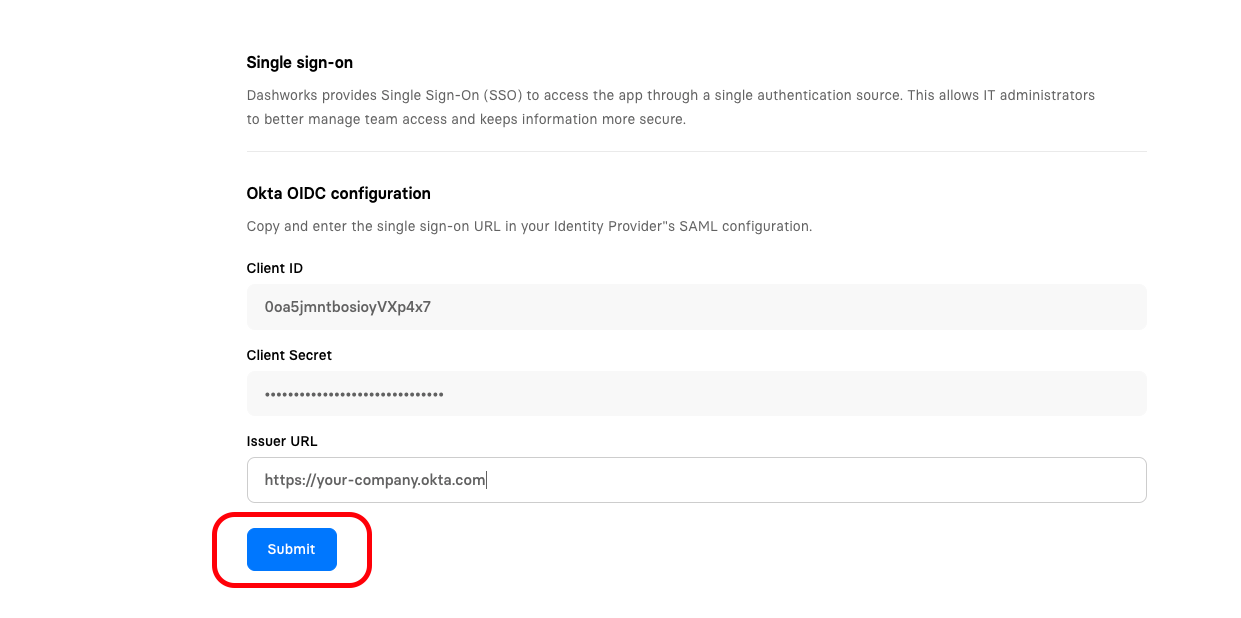
Log into Dashworks and navigate to Settings -> Security under Workspace settings. Click on Configure next to OIDC.

You will require Client ID, Client Secret, and Issuer URL

Issuer URL will be of the format https://your-company.okta.com for example https://dashworks.okta.com. You can get this from the Okta browser tab.
Also if URL has -admin suffix for example https://your-company-admin.okta.com, just remove the suffix and only use https://your-company.okta.com (https:// is required).
Fill in the Client ID, Client Secret, and Issuer URL and click Submit
On successfully applying the changes, you should see the following message:

Last updated
Was this helpful?