SCIM
Managing Members
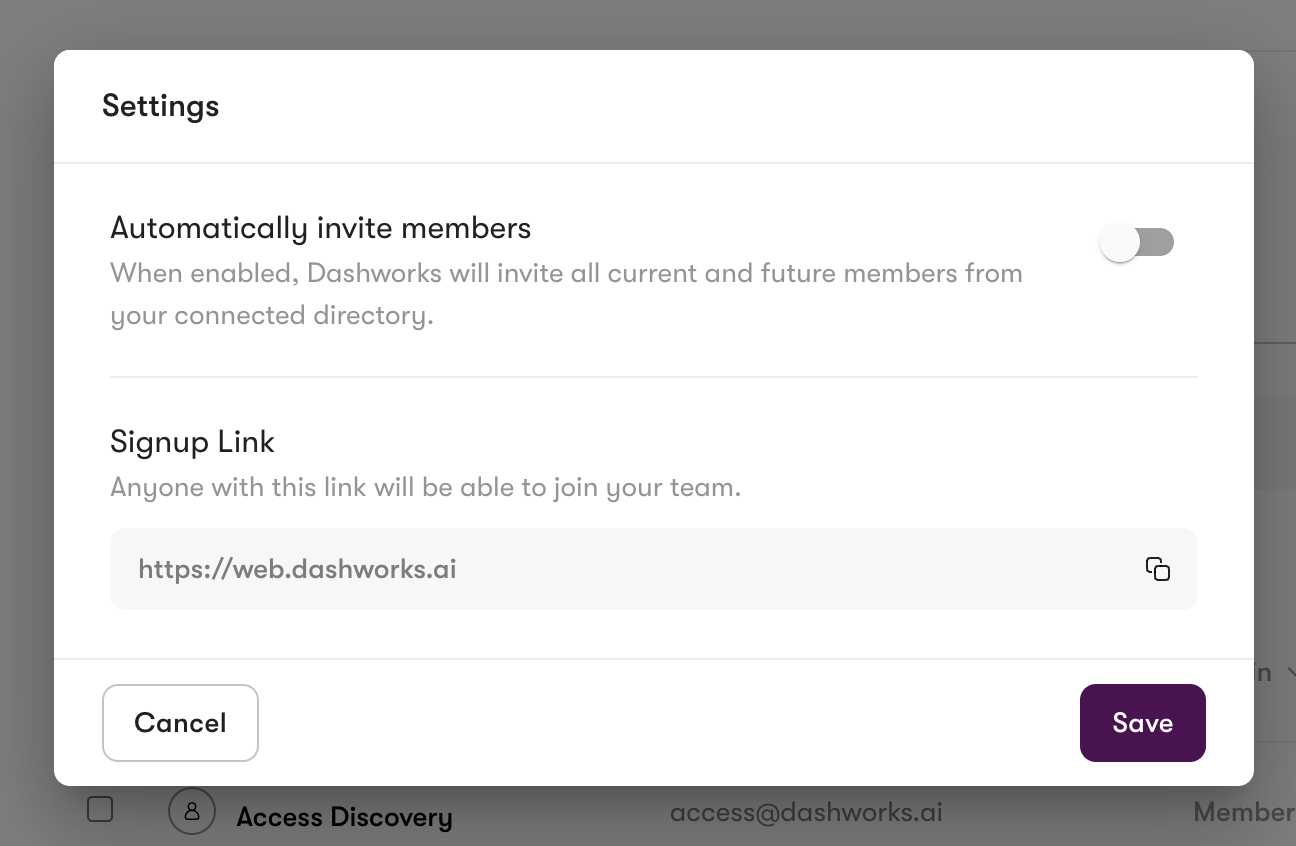
In the Members section, you can manage organization-wide settings for adding members. Options include automatically inviting members to Dashworks or using a signup link for invitations.
You can manually invite users by entering their email addresses in the invite modal and monitor if they have accepted your invitation.
You can also view who from your organization has not been invited, and who is blocked from accessing Dashworks.
Here's a quick video that reviews how to manage members and sync your directory:
Directory Sync
When you sync your company directory, new users will be automatically added to Dashworks upon joining your organization. This means Dashworks is one less tool you must remember to provide access to for new hires - they will have access as soon as they are added to your directory.
Remember to enable the “Automatically Invite Team Members” option in the Admin Settings. This ensures that all team members can access Dashworks as long as they are active in your organization.
Moreover, you can easily manage your directory within Dashworks. Regularly reviewing your 'Invited' users will reveal those who have been invited but have not yet activated their Dashworks subscription. A recommended practice is to select "Resend invite" for these users, accompanied by a personal message from you as an Admin. This way, these users are notified of their invitation and can start using Dashworks immediately.

SCIM Setup
For provisioning and deprovisioning users automatically, Dashworks supports a SCIM integration with Okta.
Requirements
Set up Okta SSO with Dashworks following the instructions at SSO.
Reach out to [email protected] for the SCIM base URL and OAuth Bearer Token for your organization.
Step-by-Step Configuration Instructions
Log into your Okta Admin account and add Dashworks app from the Application Catalog. The Dashworks app may already be present if Okta SSO is set up for your organization.
In the Application, click on Provisioning tab and then click the Configure API integration.
Fill in the details for SCIM base URL and OAuth Bearer Token and click on Test API Credentials and click save.

In the Provisioning To App Settings, enable the following:
Create Users
Update User Attributes
Deactivate Users
and click Save.
For newly created app, Click on Assignments tab in the Application and assign users to your application. In order to assign groups to sync group memberships, navigate to Push Groups tab, from the "Push Groups" dropdown, select: "Find Groups by Name". Search for the group you'd like to push and select it. Make sure the box is checked for "Push Immediately" and click "Save".

(Optional) If you have already have an app with assigned users before adding the provisioning feature, you can re-provision users by clicking on the Provision User option in the Assignments tab and then click OK to provision all users.


Application username format
Please select Email for the Application Username form.
For provisioning and deprovisioning users automatically, Dashworks supports a SCIM integration with Entra ID (formerly Azure AD).
Requirements
Set up Azure SSO with Dashworks following the instructions at Azure AD
Reach out to [email protected] for the SCIM base URL and OAuth Bearer Token for your organization.
Configure your integration
Sign in to the Entra ID Admin Center Dashboard. Select “Enterprise applications” from the list of Azure services.

Click "New Application".

Select “Create your own application” and continue.

Give your application a descriptive name (such as "Dashworks-SCIM"), and select the “Integrate any other application you don’t find in the gallery (Non-gallery)” option, then click “Create”.

Select “Provisioning” from the “Manage” section found in the navigation menu.

Click the “Get Started” button.

Select the “Automatic” Provisioning Mode from the dropdown menu.
In the “Admin Credentials” section, copy and paste the Endpoint you recieved from [email protected] in the “Tenant URL” field.
Then, copy and paste the Bearer Token you recieved from [email protected] into the Secret Token field.
Click “Test Connection” to receive confirmation that your connection has been set up correctly. Then, select “Save” to persist the credentials.

Set and enable Attribute mappings
Expand the “Mappings” section.

Make sure the group and user attribute mappings are enabled, and are mapping the correct fields. The default mapping should work, but your specific Azure setup may require you to add a custom mapping.

Make sure that you are mapping
objectIdtoexternalIdwithin the Attribute Mapping section.

Make sure that the following attributes are mapped:
usernamedisplayNamejobTitlemailgivenNamesurnameobjectIdemployeeIddepartmentmanager
Assign users and groups to your application
In order for your users and groups to be synced, you will need to assign them to your Entra ID SCIM Application. Select “Users and groups” from the “Manage” section of the navigation menu.

Select “Add user/group” from the top menu.

Select “None selected” under the “Users and Groups”. In the menu, select the users and groups that you want to add to the SCIM application, and click “Select”.

Select “Assign” to add the selected users and groups to your SCIM application.

Turn on provisioning for your SCIM application
In the Provisioning menu, confirm the “Provisioning Status” is set to “On” and that the “Scope” is set to “Sync only assigned users and groups”.

Once you begin provisioning users and groups, changes will reflect in Dashworks Members page within 60 minutes.
Last updated
Was this helpful?